

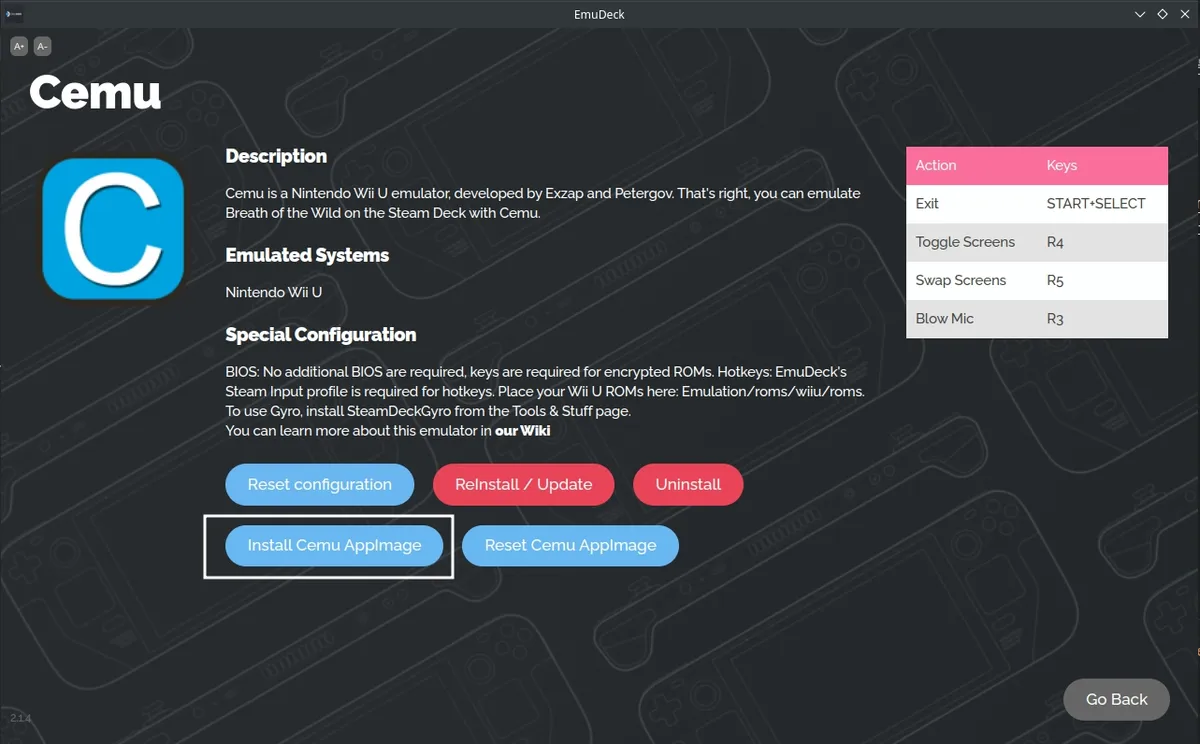
EmuDeck documents two Cemu variants: Proton and native AppImage. The native build is an optional installation. Installing it leaves both versions installed rather than replacing the Proton version.
Install the native build
- 1. In Desktop Mode, open the EmuDeck application.
- 2. Select Manage Emulators.
- 3. Select Cemu.
- 4. Select Install Cemu AppImage.
- 5. Select Reset Cemu AppImage to configure the emulator.
Choose which version to launch
EmuDeck generally recommends Cemu Native over Cemu Proton, citing less involvement with Proton layers and prefixes. This is the documentation’s general recommendation, not a guarantee of results for every game.
Game Mode through Steam ROM Manager
For native Cemu, select the Steam ROM Manager parser matching your game’s file format: “Nintendo WiiU - Cemu (.rpx) - Native” or “Nintendo WiiU - Cemu (.wud, .wux, .wua) - Native.”
For Proton, the corresponding parsers are “Nintendo WiiU - Cemu (.rpx) - Proton” and “Nintendo WiiU - Cemu (.wud, .wux, .wua) - Proton.”
Game Mode through EmulationStation-DE
- 1. Open EmulationStation-DE.
- 2. Press Start.
- 3. Open Other Settings.
- 4. Open Alternative Emulators.
- 5. For Wiiu, select Cemu [Native] or Cemu [Proton].
Desktop Mode
Open the Applications Launcher using the Steam icon at the bottom left of the taskbar. Select Cemu (Proton) for the Proton version or Cemu AppImage for the native version.
Sources & references
Content responsibility: FrameTinker editorial desk. Source authors and software maintainers are credited separately below; this is not a claim of hands-on testing.
Published .
EmuDeck: emulators — steamos — cemu — official gaming software documentation https://raw.githubusercontent.com/EmuDeck/emudeck.github.io/main/docs/emulators/steamos/cemu/index.mdRetrieved Nov 13, 2026Something doesn’t match your setup?
Suggest a correction