

Shaders are efficient graphics filters that can greatly improve the rendering of old games. They can also be used to replicate the look and feel of old CRT monitors, and they can be stacked to create your own effect.
RetroArch ships with a lot of shaders, and the official documentation notes that the array available is too large to show on a single page. This guide is a source-based summary of the official libretro documentation page; the steps below follow that page's described menu paths, but they have not been independently verified on hardware.
Shader Formats
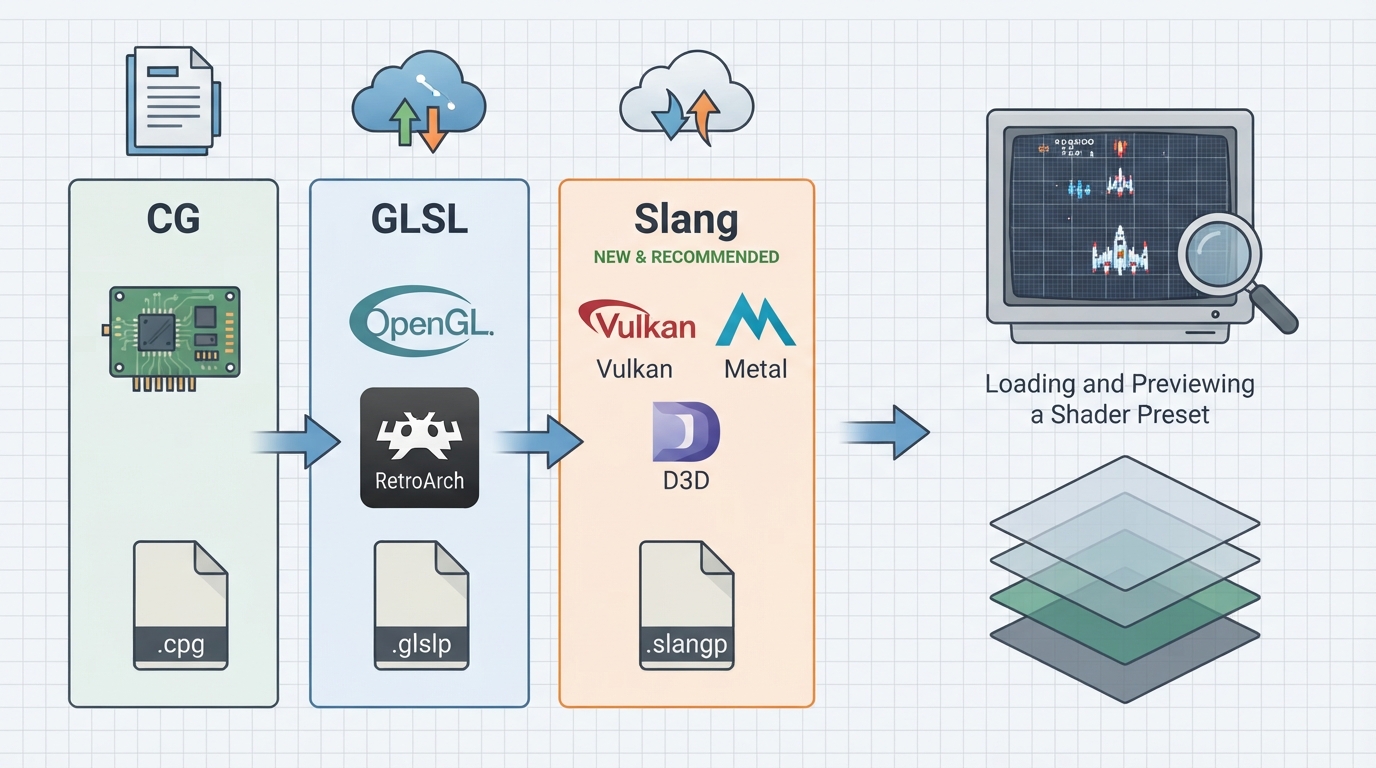
The documentation lists three shader formats. Depending on your platform and the way you have configured RetroArch, you need to use one of these shader types.
- CG: an old, deprecated format. It might not be available if RetroArch is built without Cg runtime support.
- GLSL: a shader format available to OpenGL, usable on a wide range of platforms including phones and tablets.
- Slang: a new and recommended shader format when available, compatible with the Vulkan, Direct3D 10/11/12, OpenGL Core, WiiU and Metal renderers.
Preset File Extensions
Preset files use the following extensions, one per shader format:
- .cpg for CG
- .glslp for GLSL
- .slangp for Slang
Downloading Shader Packs
You can download or upgrade the shader packs for the 3 types by going to Main Menu -> Online Updater.
How to Load a Shader Preset
To enable a shader preset, you need to have a game running.
- With a game running, trigger the menu. A Shaders entry appears in the Quick Menu.
- Go to Load Shader Preset and choose a preset file.
In the documentation's example, the preset used is shaders_glsl/crt/crt-geom.glslp.
Previewing and Saving Shader Parameters
- Go to Preview Shader Parameters and start playing with the values.
- When you are happy with your changes, you can save them under a new preset file.
Scope and Limitations
This guide covers only what the official introduction page documents: what shaders do, the three shader formats and their preset extensions, downloading shader packs, loading a preset, and previewing and saving parameter changes. It does not cover custom shader creation, detailed compatibility requirements, performance impact, platform-specific availability, or preset file paths, because those are not documented on the source page.
Reference table · Scroll horizontally to see all columns.
| Shader format | Preset extension | Notes |
|---|---|---|
| CG | .cpg | Old, deprecated format. Might not be available if RetroArch is built without Cg runtime support. |
| GLSL | .glslp | Available to OpenGL. Wide range of platforms including phones and tablets. |
| Slang | .slangp | New and recommended when available. Compatible with Vulkan, Direct3D 10/11/12, OpenGL Core, WiiU and Metal renderers. |
- Download or upgrade shader packs for the 3 types via Main Menu -> Online Updater.
- Start a game, since a game must be running to enable a shader preset.
- Trigger the menu and open the Shaders entry in the Quick Menu.
- Go to Load Shader Preset and choose a preset file.
- Go to Preview Shader Parameters to adjust values live.
- Save your changes under a new preset file when satisfied.
Sources & references
Content responsibility: FrameTinker editorial desk. Source authors and software maintainers are credited separately below; this is not a claim of hands-on testing.
Published .
RetroArch: introduction — official gaming software documentation https://raw.githubusercontent.com/libretro/docs/master/docs/shader/introduction.mdRetrieved Oct 14, 2026Something doesn’t match your setup?
Suggest a correction