

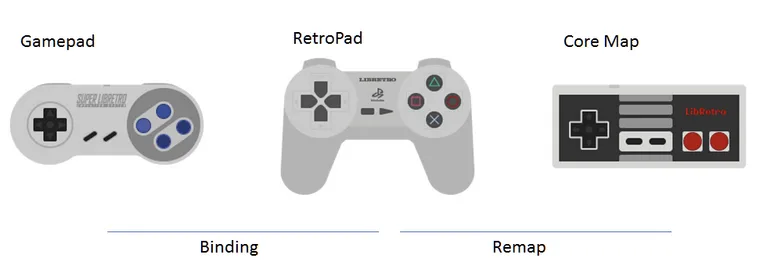
Understand the mapping layers
RetroArch uses two mapping layers: your physical controller maps to the virtual RetroPad, and the RetroPad maps to the original console or computer’s controller. The per-game remap described here concerns that second layer.
Create the game-specific remap
1. Open RetroBat and launch the game whose controls you want to change.
3. In Quick Menu, select Controls and make the required remapping changes.
4. Return to Controls, open Manage Remap Files, and save the remap for the game. This save applies only to that game.
File reference
- - General controller bindings: retroarch.cfg in /emulators/retroarch.
- - Remap files: .rmp files in /emulators/retroarch/config/remaps.
Evidence and publication details
Sources & references
Content responsibility: FrameTinker editorial desk. Source authors and software maintainers are credited separately below; this is not a claim of hands-on testing.
Published .
RetroBat: controllers — specific mapping — retroarch controller mapping — official gaming software documentation https://raw.githubusercontent.com/RetroBat-Official/retrobat-wiki/master/lang/en/controllers/specific_mapping/retroarch-controller-mapping.mdRetrieved Nov 17, 2026Something doesn’t match your setup?
Suggest a correction